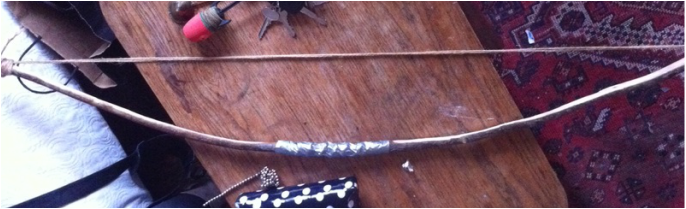
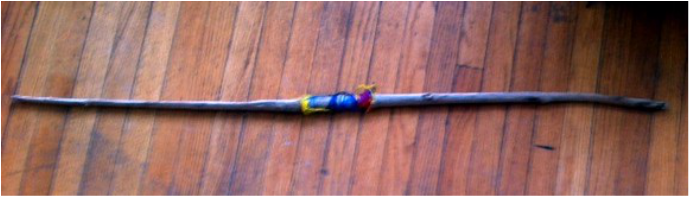
Primitive Bow Complete!
I started with this idea of making a primitive bow and arrow about four months ago with the ultimate idea of eventually using it to hunt fish because how cool does that sound? In the beginning I had almost no idea of what I was getting myself into and assumed I could conquer this goal within a few weeks. Once I had done my necessary research on the actual techniques and tricks of what makes a working bow I figured the product would be easy to create although this is not what happened. I constantly was learning from my own mistakes and becoming more and more frustrated with every bow breaking after weeks of work. On my last bow I powered through the carving and shaping in just a weekend and my whole body was sore. This was the most effort I had put in so far and I felt like giving up if this one had broken. After four months of much trial and error, four broken bows, and beat up hands from carving, I finally turned out my first ever working bow and arrow.
On February 4, I had finally completed my bow and was eager to shoot it and prove everything I had done wasn't for nothing. I set up a foam target and everyone gathered around me. Suspense was building as everyone rallied to their positions, filming from every angle. Finally as I stretched back the string and the arrow perfectly flung into the target. Success was mine!
A few things I learned:
- When working with wood, you want to complete your carving within a few days of uncovering the inner layers in order for the wood to remain wet and not brittle or else it will break.
- Bends in the wood really matter and in order to have a perfectly curved bow you actually want to find the straightest sapling or tree you can find.
- In order to keep the stave from drying out over time, you want to coat the bow in oil in order to secure the moisture in. This could be from professional wood oil or simply wood floor finisher.
- Knots are in most saplings and although these are considered weak spots in the wood if you carve them down enough and sand it down afterwards, these knots shouldn't affect your wood.
After knowing the feeling of failure and success, I will now begin on my next project and continue to make my dreams a reality.
Progress:
Oh no! Month's of Work Down the Drain...
From the Top! |
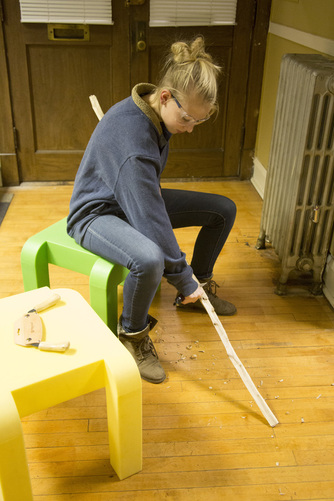
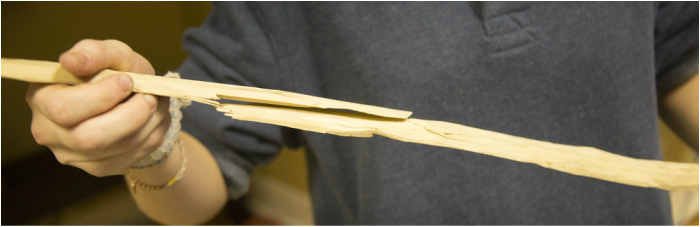
Today I began whittling down at my stick I have been working for about three months. My goal is to create enough bend in attempts to string the bow next.
I made a ton of progress and at the end when I was checking the bendability the stick broke. I believe this was due to the length it took me to carve it, the stick slowly dried out creating more of a brittle, breakable stick unable to bend. |
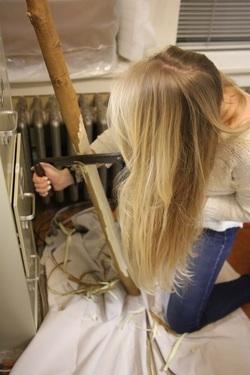
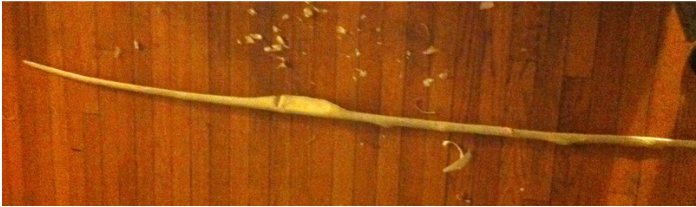
Today having gotten a new stick after my other had broken, I started once more from the beginning. I measured out six feet of the stick and sawed off the top in order to make it this desired length. The point of this is to have enough leverage and power to eventually drive an arrow through a target. Then I made it my goal to carve off all of the bark of the branch and begin to thin out the ends of the bow that will eventually bend.
I completed this goal and now will be working towards finishing thinning out the ends until the branch bends as desired.
Cracks on Cracks...
|
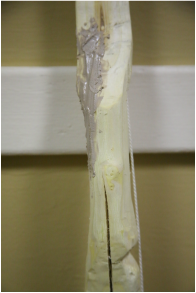
Over the weekend I completed thinning out the ends and finished carving down the handhold to easily fit in my palm. During this time when I was carving down my bow I noticed two cracks around my handhold which only appeared to be cosmetic. I left this bow strung up overnight in order to break in the limbs and allow it to take shape of an actual bow. After noticing these cracks have deepened since the day before, I went out and got wood filler and now I am planning on filling in these cracks and sanding down the excess filler to make it level with the rest of the bow. With the arrow given to me by my friend Nikki, I plan to use it to test out my finished bow.
I completed this goal and made a makeshift target out of Styrofoam and I successfully shot the arrow through it. |
Progression of Bows:
1st bow: The stick is about 4 feet, not very carved down, and make shift grip tape. Bow broke when the string was pulled back.
2nd bow: Stick is longer and wider, approx. 6 feet, and there are a few knots in the wood. Stick broke after being dried out and too thin.
3rd bow: Stick was 6 feet long and 1.5 inches wide. I almost strung this bow but after it had been drying out for a few months, went I bent it, it broke.

Final bow: Finished product was 6 feet and approx. two inches wide, I completed this bow in the matter of a week. Kept it from drying out and allowed to me successfully shoot an arrow!
